The complete CI/CD Setup (Part 4 - Postman API testing)
In this series of blog posts I’ll describe how to setup on a small environment a complete Continuous Integration and Continuous Deployment pipeline, which components are required and how to deploy them and how to make this a bit more general for additional applications.
- In the first part I’ve made an overview and described the components that I’ll deploy.
- In the second part we have deployed the components that are required for the pipeline.
- In the third part we have created our first Continuous Integration and Continuous Deployment pipeline
- In this part we will now add Postman API tests to validate after each Deployment that our application still runs as expected.
What is Postman
Postman is a tool for testing APIs and developing APIs. Most developers have used Postman to simply test APIs and to run simple HTTP Requests. But Postman can do much more, you can use Postman for example to test APIs and write tests against the response body. But you can also use Postman for continuous Monitoring of your running application to check if everything works as expected. Postman has an Enterprise Version, but most of the described things can be done also out of the box with the free version. Postman uses under the hood newman a node package that performs the requests and also executes the tests written in JavaScript.
Writing the first tests
Our application we run Continuous Integration and Continuous Deployment on via Jenkins to Kubernetes in Part 3 of the blog post series is now running and we want to check if the api runs still as expected. First we define now an environment with a variable for the url to allow for example tests against localhost and also tests for our running environment.
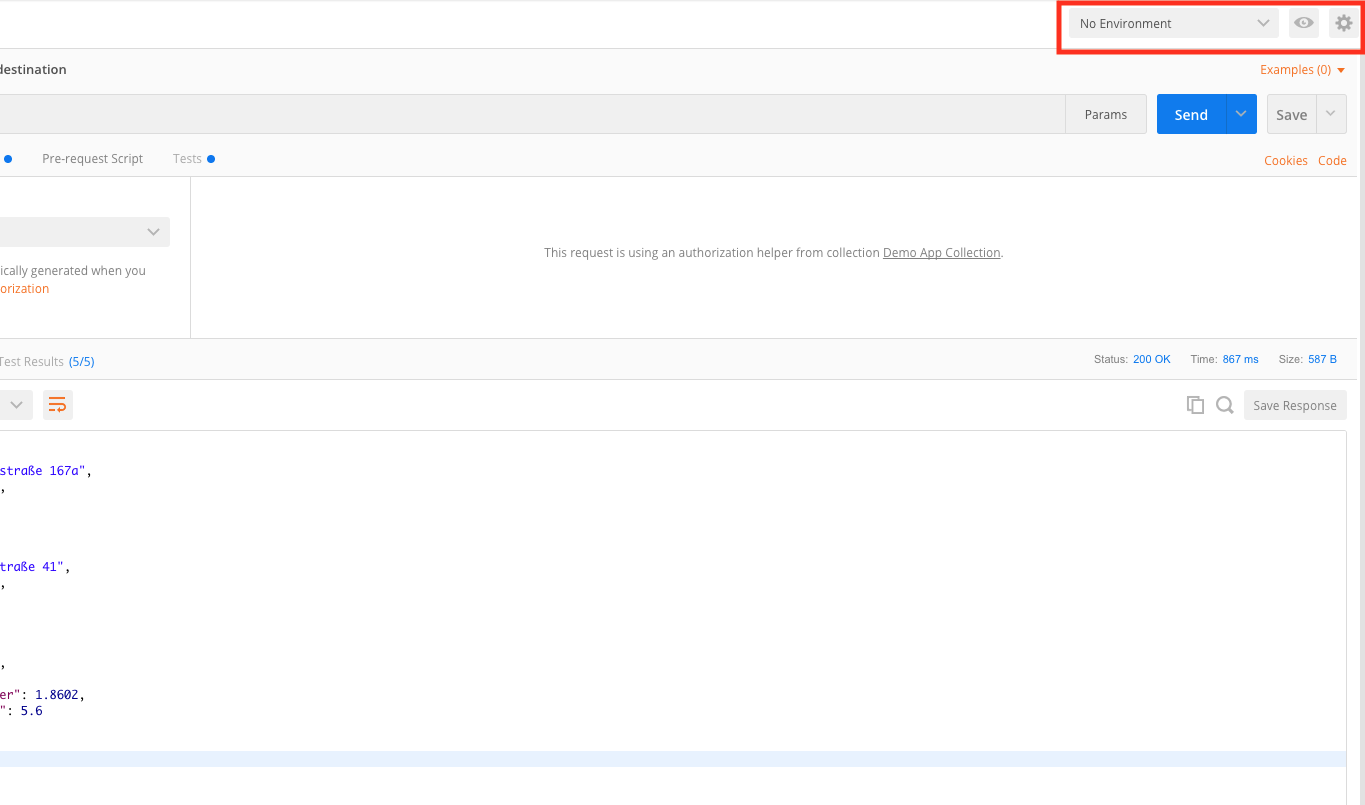
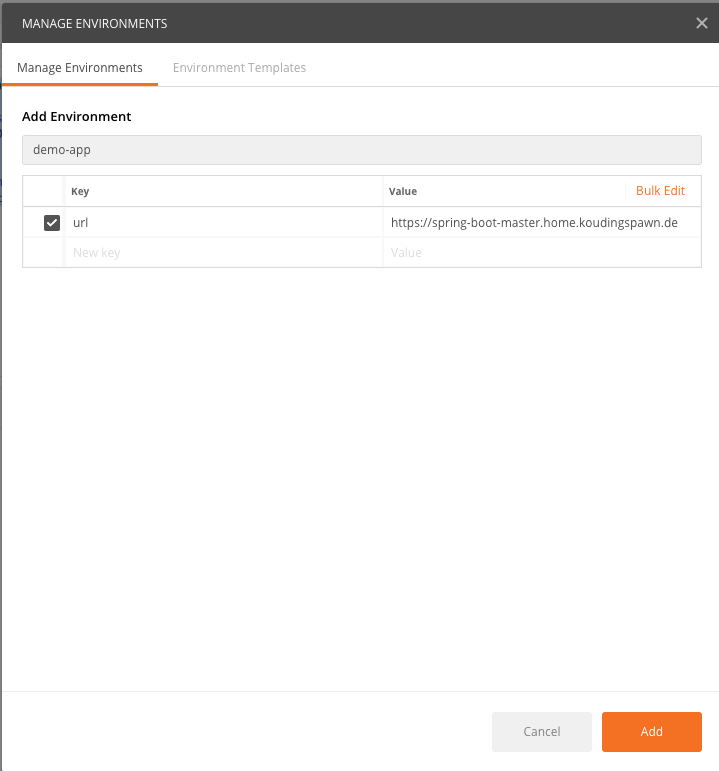
Therefore we click on the Settings logo in the right box and on Add in the next Environment list dialog. Now we can define variables in our environment, in this case we define the url to our running application in Kubernetes that was deployed by Jenkins.
After we closed the environment modal we can select now this environment from the dropdown list marked in the first picture. Now we can write our first api test and are able to use the url variable instead of writing this directly in the field:
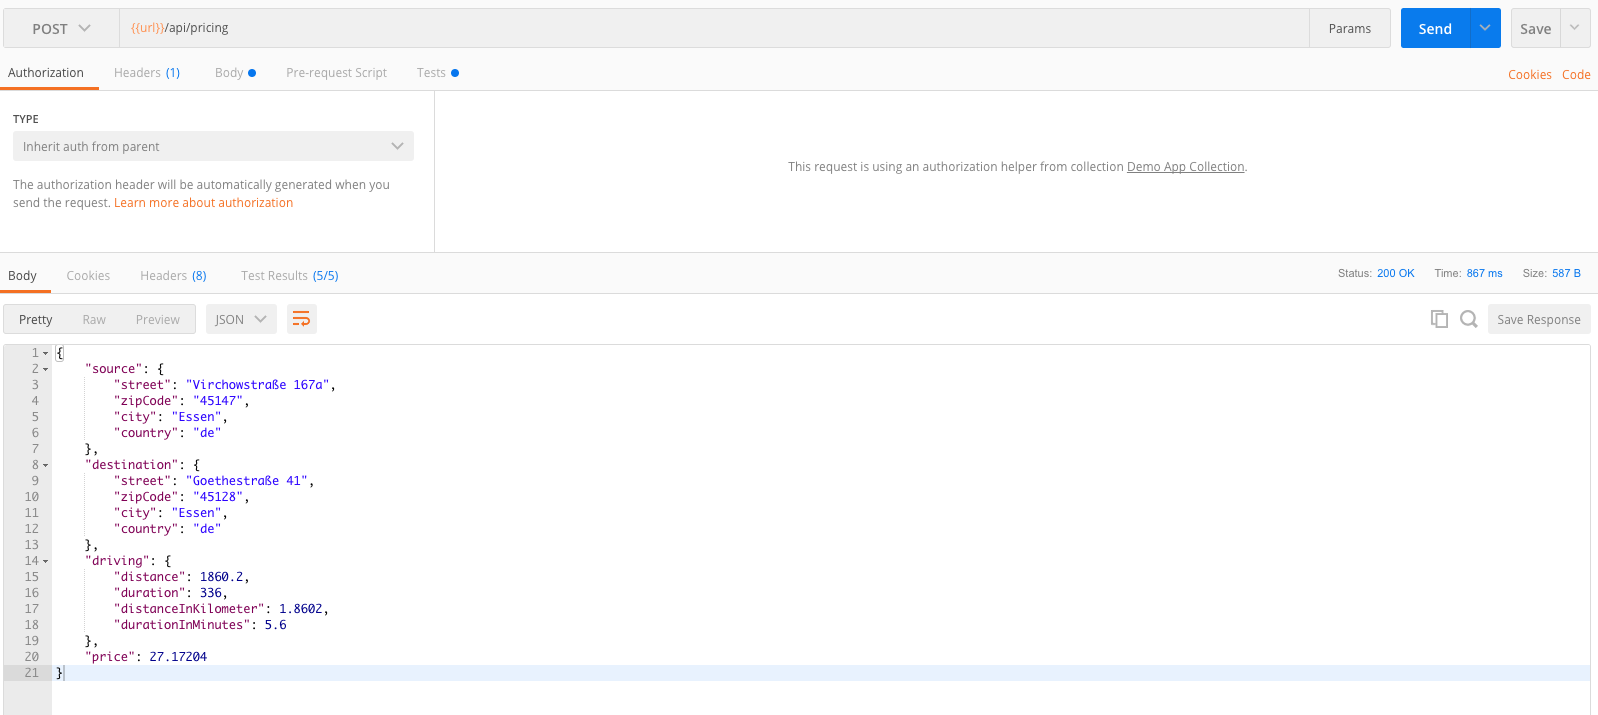
So far so good, we write a POST call that connects to our url and sends some body inside of it, this is the typical thing we are doing most of the time. But the interresting thing is we are now able to write a test for it. Therefore we click on the Tests Tab right below the URL field and write down the following tests:
var jsonData = pm.response.json();

pm.test("Validate response content for source street", function () {
    pm.expect(jsonData.source.street).to.contain("Virchowstraße");
});

pm.test("Validate response content for destination street", function() {
    pm.expect(jsonData.destination.street).to.contain("Goethestraße");
});

pm.test("Validate response content for distance in Kilometer to be above 1", function() {
    pm.expect(jsonData.driving.distanceInKilometer).to.be.above(1);
});

pm.test("Validate response content for duration to be above 5 minuntes", function() {
    pm.expect(jsonData.driving.durationInMinutes).to.be.above(5);
});

pm.test("Validate response content for price to be 27 Euro", function() {
    var price = Math.trunc(jsonData.price);
    pm.expect(price).to.be.equal(27);
});
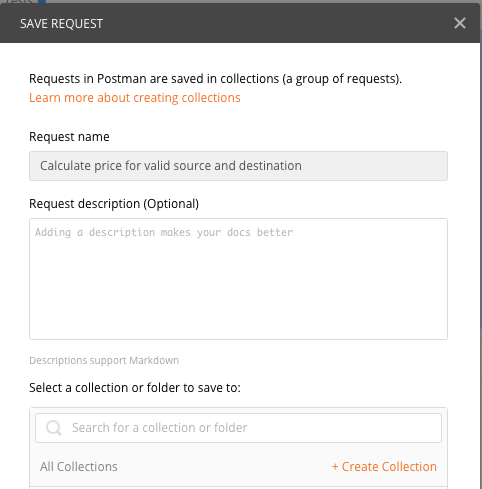
If you now Send the request again you should see the response and also an additional Tab called “Test Results”, there you can see now that the response was tested with the tests we wrote before. Now we can Save the test to a new Collection, therefore we click on Save next to the send button and create a Collection and name the test:
To have more then one test we can also write some failing test and expect the correct failure handling. Therefore we copy the existing test and change the request body to an invalid one. This allows us now to write the following test:
var jsonData = pm.response.json();

pm.test("Request is failed with status code 404", function () {
    pm.response.to.have.status(404);
});

pm.test("Validate response content to contain failure message", function () {
    pm.expect(jsonData.message).to.equals("No pricing available for the specified source and destination!");
});
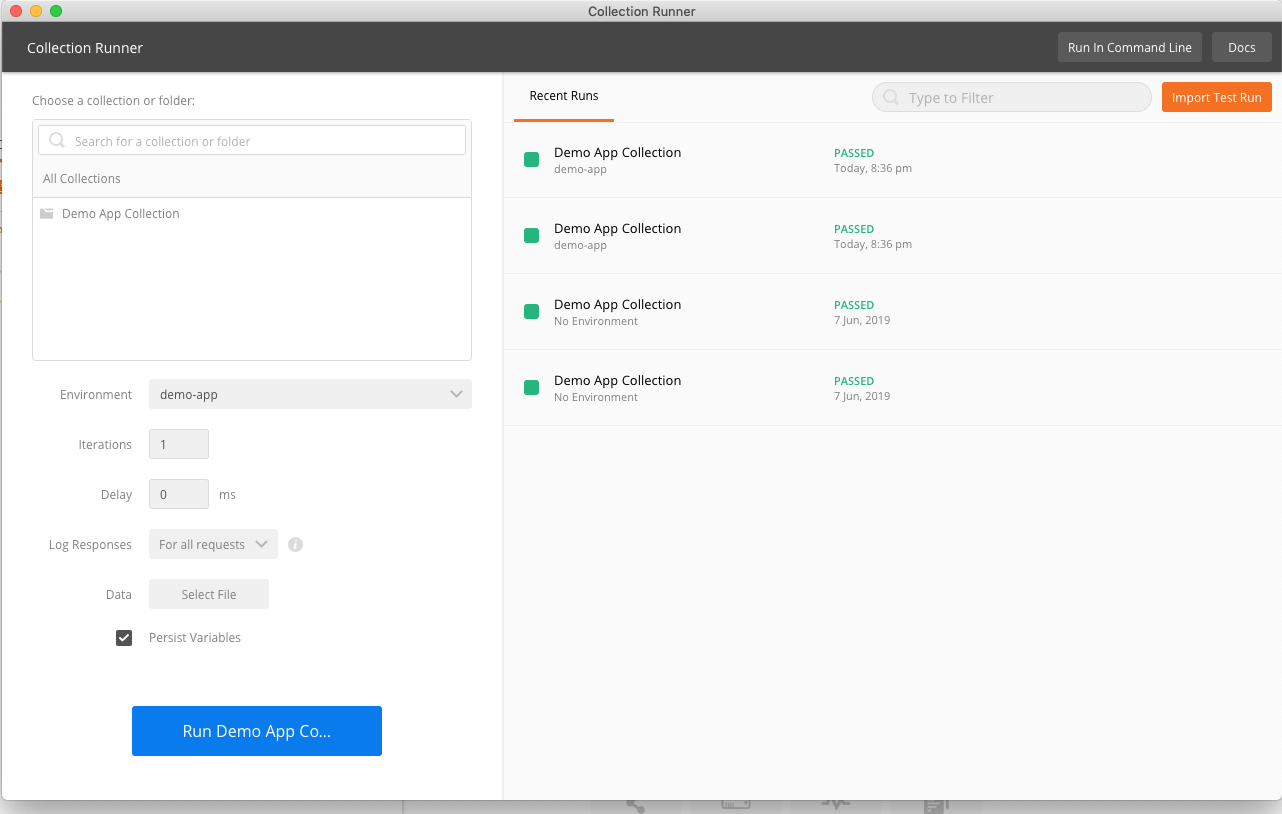
When we save this now again we have two tests in the collection and can run this now automatically from inside Postman. Therefore we click on the left side on the Collections tab and on the Collection we created. Next to the name of the collection we can hover and see a play button, a new dialog opens and we can click on run. This opens a new modal where we can select our environment we created and how often the tests should be executed. After this we can click on Run, this should run the tests and we should see an overview of the test results.
But this is not really automated, so the target is to run this Postman tests automatically after the application was deployed. Therefore we save the collection by clicking on the three dots next to the collection in the postman main screen and on Export. Now we can save the collection in format v2.1 thats also the recommended way how to save postman collections. Here you can find the tests in the git repository.
Extend the Jenkinsfile
To extend our Jenkinsfile we can now simply add a new container to our pod that uses postman/newman as image (as already said newman is the engine that executes the collections saved as json file):
containerTemplate(name: 'newman', image: 'postman/newman', ttyEnabled: true, command: 'cat')
And extend the stages with a new test stage, there we overwrite the url variable with the url from the running application:
container('newman') {
    stage("Test") {
        sh("""
            newman run \
            Demo-App-Collection.postman_collection.json \
            --env-var url=https://${url} \
            -n 2
        """)
    }
}
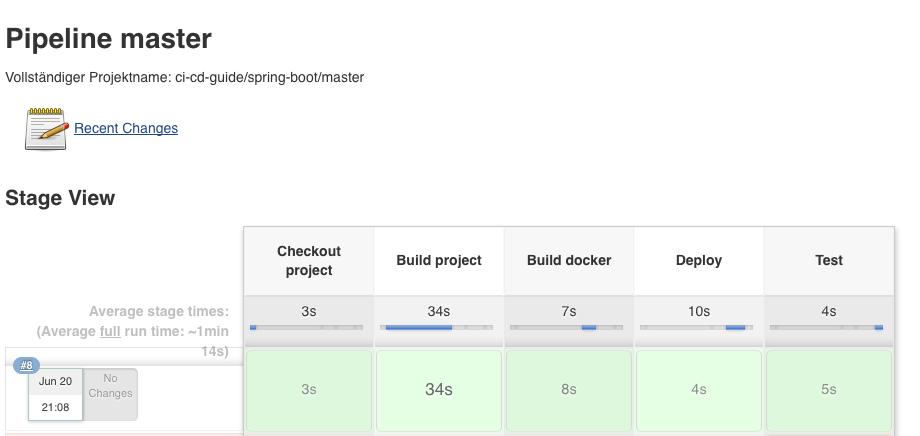
The resulting Jenkinsfile looks like this:
def label = "ci-cd-${UUID.randomUUID().toString()}"

podTemplate(label: label,
    serviceAccount: 'helm',
    containers: [
        containerTemplate(name: 'maven', image: 'maven:3.6-jdk-11-slim', ttyEnabled: true, command: 'cat'),
        containerTemplate(
            name: 'docker',
            image: 'docker',
            command: 'cat',
            ttyEnabled: true,
            envVars: [
                secretEnvVar(key: 'REGISTRY_USERNAME', secretName: 'registry-credentials', secretKey: 'username'),
                secretEnvVar(key: 'REGISTRY_PASSWORD', secretName: 'registry-credentials', secretKey: 'password')
            ]
        ),
        containerTemplate(name: 'helm', image: 'alpine/helm:2.11.0', command: 'cat', ttyEnabled: true),
        containerTemplate(name: 'newman', image: 'postman/newman', ttyEnabled: true, command: 'cat')
    ],
    volumes: [
        hostPathVolume(hostPath: '/var/run/docker.sock', mountPath: '/var/run/docker.sock')
    ]) {

    node(label) {
        stage('Checkout project') {
            def repo = checkout scm
            def dockerImage = "ci-cd-guide/spring-boot"
            def dockerTag = "${repo.GIT_BRANCH}-${repo.GIT_COMMIT}"
            def registryUrl = "registry.home.koudingspawn.de"
            def helmName = "spring-boot-${repo.GIT_BRANCH}"
            def url = "${helmName}.home.koudingspawn.de"
            def certVaultPath = "certificates/*.home.koudingspawn.de"

            container('maven') {
                stage('Build project') {
                    sh 'mvn -B clean install'
                }
            }

            container('docker') {
                stage('Build docker') {
                    sh "docker build -t ${registryUrl}/${dockerImage}:${dockerTag} ."
                    sh "docker login ${registryUrl} --username \$REGISTRY_USERNAME --password \$REGISTRY_PASSWORD"
                    sh "docker push ${registryUrl}/${dockerImage}:${dockerTag}"
                    sh "docker rmi ${registryUrl}/${dockerImage}:${dockerTag}"
                }
            }

            if ("${repo.GIT_BRANCH}" == "master") {
                container('helm') {
                    stage("Deploy") {
                        sh("""helm upgrade --install ${helmName} --namespace='${helmName}' \
                                --set ingress.enabled=true \
                                --set ingress.hosts[0]='${url}' \
                                --set ingress.annotations.\"kubernetes\\.io/ingress\\.class\"=nginx \
                                --set ingress.tls[0].hosts[0]='${url}' \
                                --set ingress.tls[0].secretName='tls-${url}' \
                                --set ingress.tls[0].vaultPath='${certVaultPath}' \
                                --set ingress.tls[0].vaultType='CERT' \
                                --set image.tag='${dockerTag}' \
                                --set image.repository='${registryUrl}/${dockerImage}' \
                                --wait \
                               ./helm""")
                    }
                }

                container('newman') {
                    stage("Test") {
                        sh("""
                            newman run \
                            Demo-App-Collection.postman_collection.json \
                            --env-var url=https://${url} \
                            -n 2
                        """)
                    }
                }
            }
        }
    }
}
And the output should look like this:
+ newman run Demo-App-Collection.postman_collection.json --env-var 'url=https://spring-boot-master.home.koudingspawn.de' -n 2
newman

Demo App Collection

Iteration 1/2

→ Calculate price for valid source and destination
  POST https://spring-boot-master.home.koudingspawn.de/api/pricing [200 OK, 587B, 798ms]
  ✓  Validate response content for source street
  ✓  Validate response content for destination street
  ✓  Validate response content for distance in Kilometer to be above 1
  ✓  Validate response content for duration to be above 5 minuntes
  ✓  Validate response content for price to be 27 Euro

→ Fail to calculate price because locations not exist
  POST https://spring-boot-master.home.koudingspawn.de/api/pricing [404 Not Found, 468B, 540ms]
  ✓  Request is failed with status code 404
  ✓  Validate response content to contain failure message

Iteration 2/2

→ Calculate price for valid source and destination
  POST https://spring-boot-master.home.koudingspawn.de/api/pricing [200 OK, 587B, 233ms]
  ✓  Validate response content for source street
  ✓  Validate response content for destination street
  ✓  Validate response content for distance in Kilometer to be above 1
  ✓  Validate response content for duration to be above 5 minuntes
  ✓  Validate response content for price to be 27 Euro

→ Fail to calculate price because locations not exist
  POST https://spring-boot-master.home.koudingspawn.de/api/pricing [404 Not Found, 468B, 513ms]
  ✓  Request is failed with status code 404
  ✓  Validate response content to contain failure message

┌─────────────────────────┬─────────────────────┬────────────────────┐
│                         │            executed │             failed │
├─────────────────────────┼─────────────────────┼────────────────────┤
│              iterations │                   2 │                  0 │
├─────────────────────────┼─────────────────────┼────────────────────┤
│                requests │                   4 │                  0 │
├─────────────────────────┼─────────────────────┼────────────────────┤
│            test-scripts │                   4 │                  0 │
├─────────────────────────┼─────────────────────┼────────────────────┤
│      prerequest-scripts │                   0 │                  0 │
├─────────────────────────┼─────────────────────┼────────────────────┤
│              assertions │                  14 │                  0 │
├─────────────────────────┴─────────────────────┴────────────────────┤
│ total run duration: 2.2s                                           │
├────────────────────────────────────────────────────────────────────┤
│ total data received: 948B (approx)                                 │
├────────────────────────────────────────────────────────────────────┤
│ average response time: 521ms [min: 233ms, max: 798ms, s.d.: 200ms] │
└────────────────────────────────────────────────────────────────────┘
So after this our application gets build, a docker image gets created on each new push and on master branch it gets also deployed and after this the postman tests are executed.
In Part 5 we will develop a concept to automatically deploy the application during Pull Requests and clean it up after the Pull Request gets closed.