Combine HashiCorp Vault with AWS IAM Roles Anywhere
Yesterday AWS released a new feature called AWS IAM Roles Anywhere for workloads running outside of AWS.
As this seems to be a very promising new feature to allow workloads running outside of AWS to assume AWS Credentials to perform actions (e.g. store backups on S3) and not have to use hardcoded AWS credentials I made the decission to give it a try.
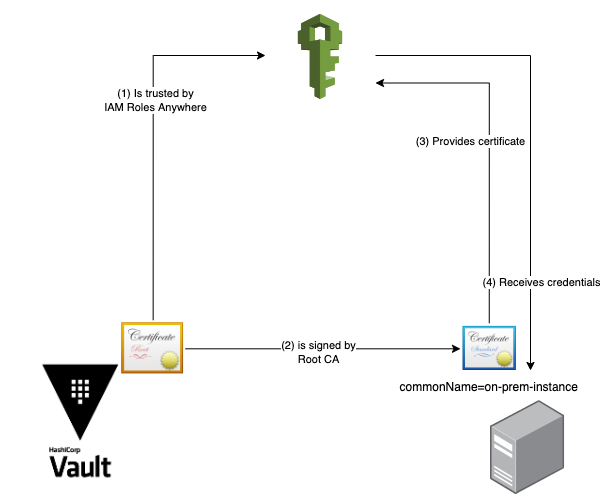
The following post describes how to combine AWS IAM Roles Anywhere with HashiCorp Vault to use Vault as the Trust anchor to request AWS Credentials based on a PKI that is managed via Vault.
(1) Generate a Certificate Authority and add trust within AWS
The first step is to start a HashiCorp Vault instance.
Please note that in our example we use a simple development Vault Server. This is not recommended for production use!
docker run --cap-add=IPC_LOCK -e 'VAULT_DEV_ROOT_TOKEN_ID=myroot' -p 8200:8200 --name vault -d vault:1.11.0
export VAULT_ADDR='http://0.0.0.0:8200'
export VAULT_TOKEN="myroot"
As soon as the Vault instance is started we can setup our own Authority within HashiCorp Vault.
Please note: Our generated PKI is not signed by an offline Authority which is the recommended way, as it adds an additional level of security.
vault secrets enable -path=pki-aws -description="aws pki" pki
vault secrets tune -max-lease-ttl=8760h pki-aws
vault write pki-aws/root/generate/internal \
      common_name=koudingspawn.de \
      ttl=8500h
Now we receive from HashiCorp Vault the root Certificate we use as Trust anchor within AWS.
Please copy this Certificate and login to your AWS Console. Within your AWS Console please search for IAM and on the left side for Roles. Now scroll down, there you should see as a new point below the list of Roles a new area called Roles Anywhere. There click on “Manage”.
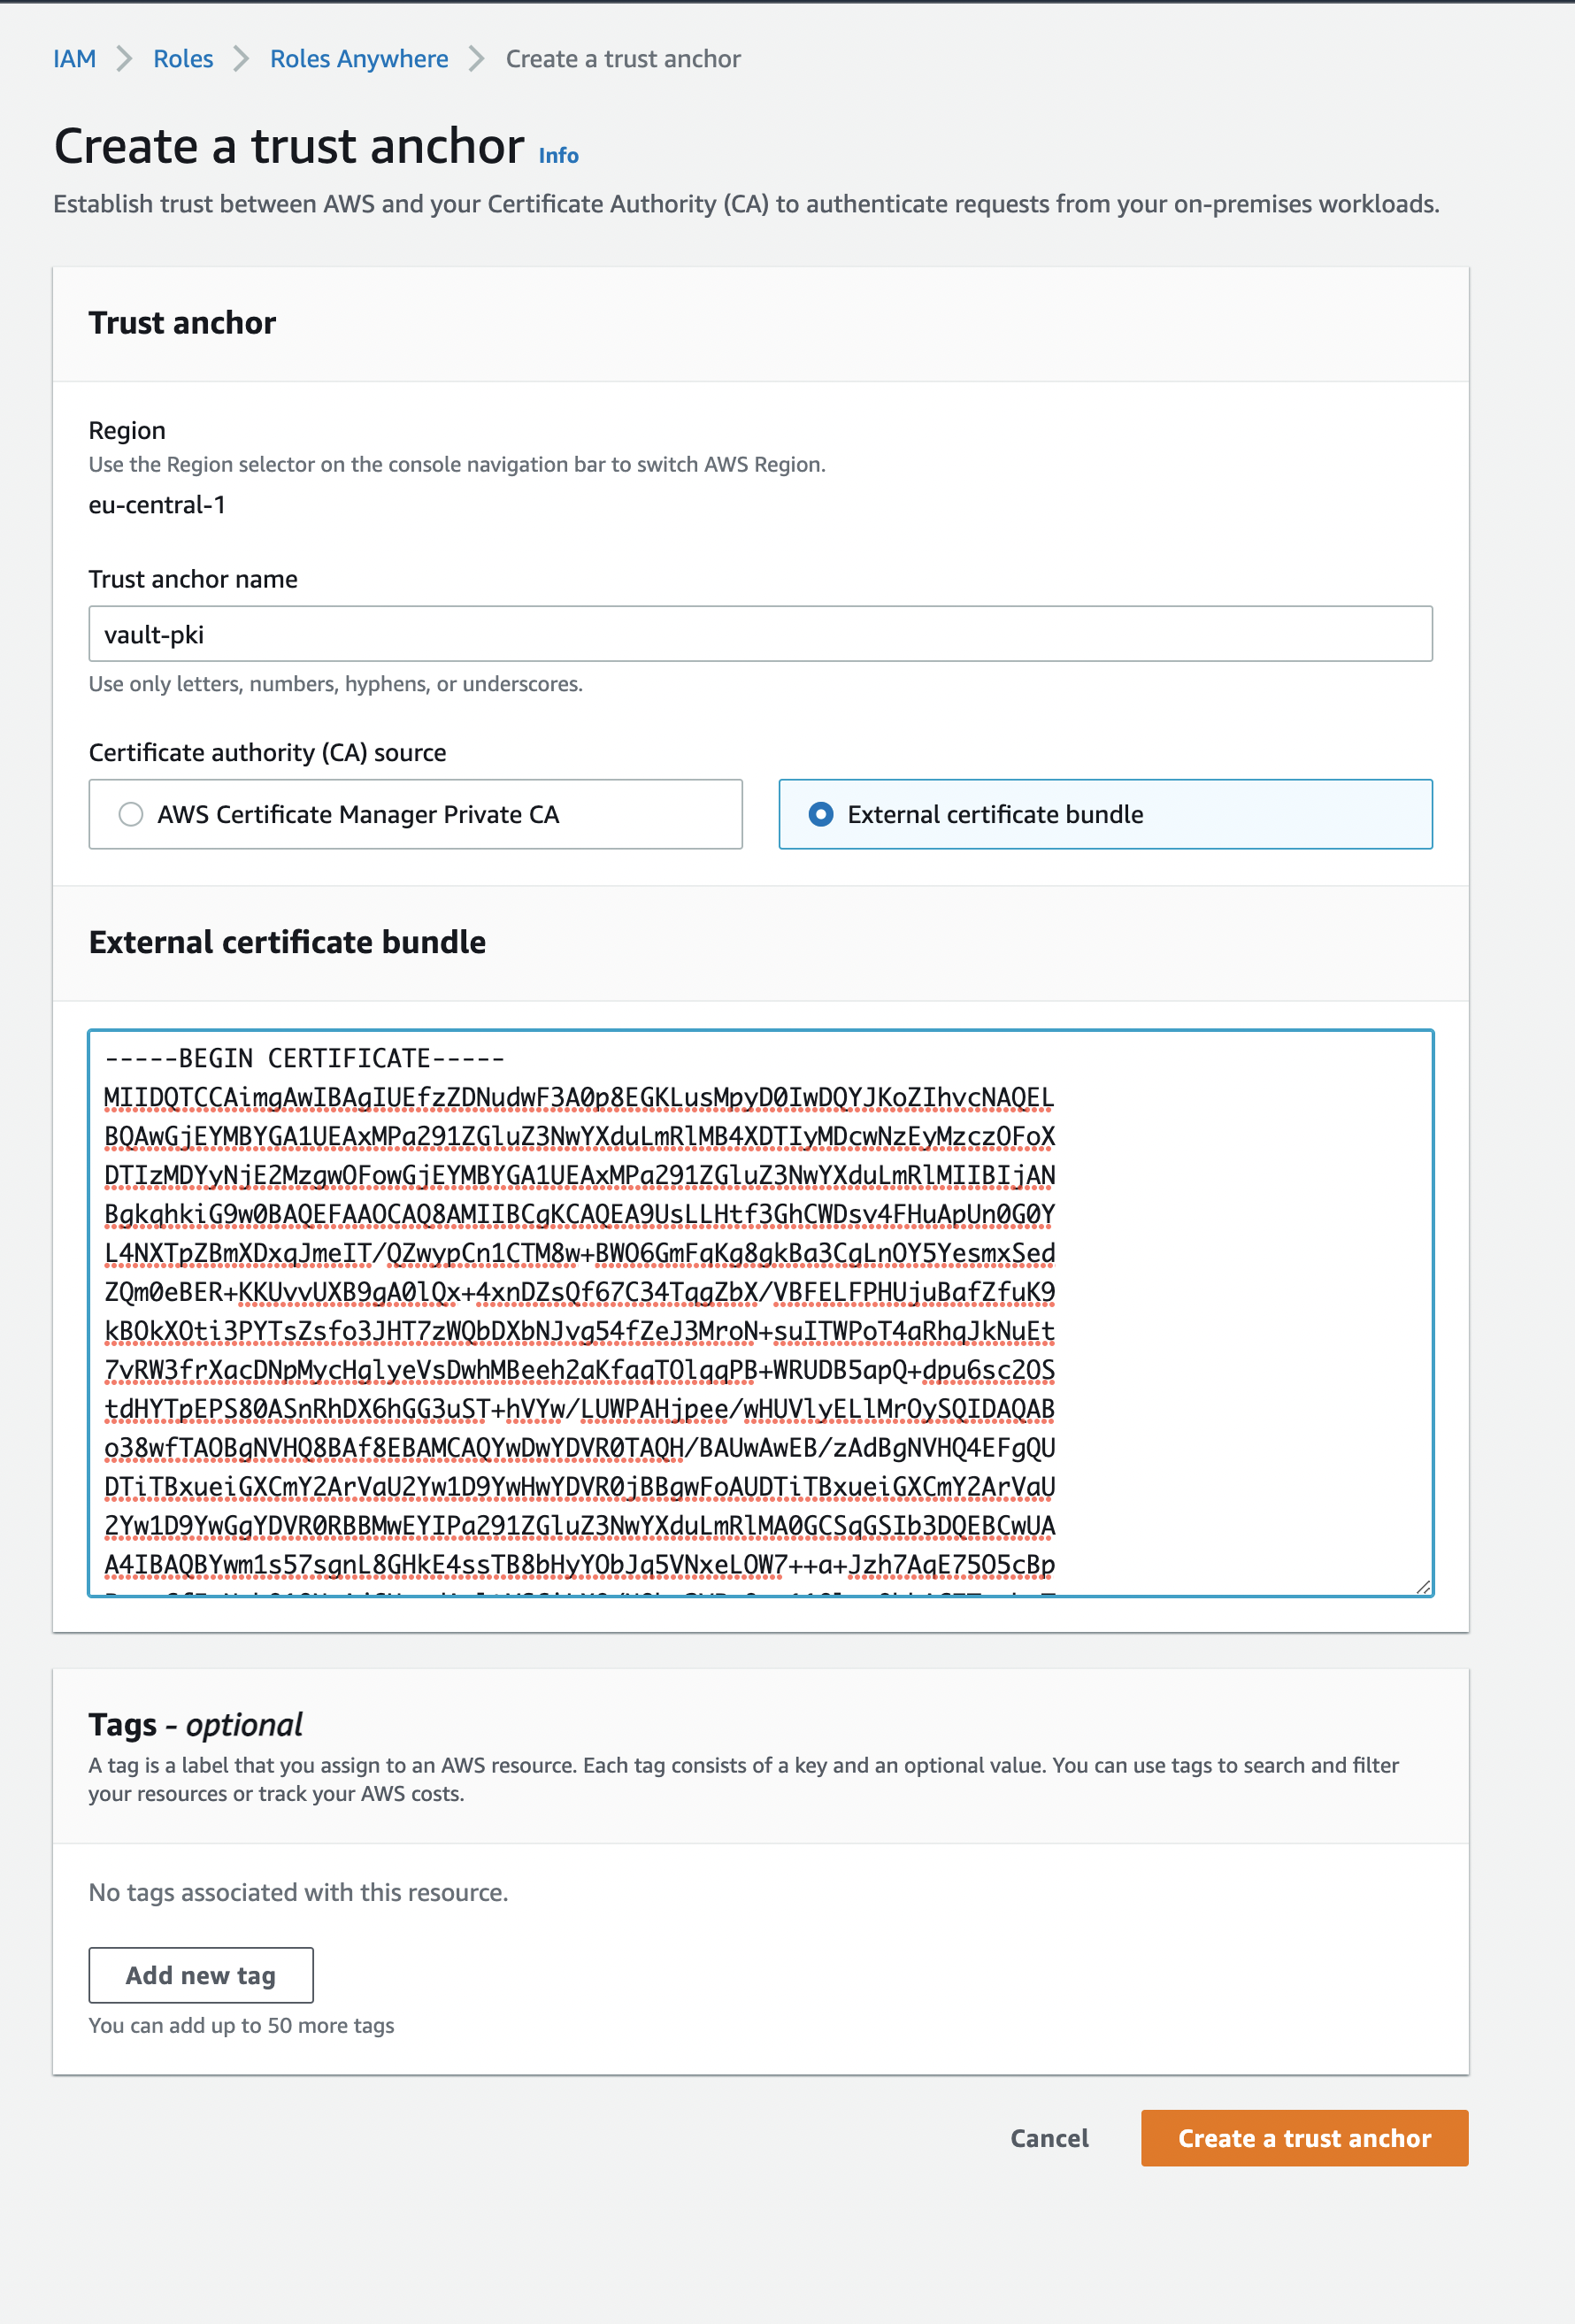
Now a new dialog opens which allows you to “Create a Trust anchor” to configure AWS to trust our Certificate Authority we previously generated within HashiCorp Vault.
Inside this dialog please define a Trust anchor name and as Certificate authority use an “external certificate bundle”. In the following text field please paste your root Certificate we received previously from HashiCorp Vault:
Generate a IAM Role that can be assumed by the on-prem machine
As we now have defined a Trust anchor the next step is to define an IAM Role that can be assumed by a certificate provided by HashiCorp Vault. Therefor we create a simple IAM Role which has a trust relationship for IAM Roles Anywhere:
{
    "Version": "2012-10-17",
    "Statement": [
      {
        "Effect": "Allow",
        "Principal": "rolesanywhere.amazonaws.com",
        "Action": [
          "sts:AssumeRole",
          "sts:TagSession",
          "sts:SetSourceIdentity"
        ],
        "Condition": {
          "StringEquals": {
            "aws:PrincipalTag/x509Subject/CN": "on-prem-instance"
          }
        }
      }
    ]
}
The interesting part is within the trust relationship. Here we define that this role can be assumed by rolesanywhere.amazonaws.com and that the Certificate that requests this Role must have a Common Name called on-prem-instance.
With this only Certificates signed by our Certificate authority with the Common Name on-prem-instance are able to assume these credentials.
For this IAM Role we also define an IAM Policy that allows this Role to perform S3:ListAllMyBuckets and s3:GetBucketLocation:
{
  "Version": "2012-10-17",
  "Statement": [
    {
      "Effect": "Allow",
      "Resource": "*",
      "Action": [
        "s3:ListAllMyBuckets",
        "s3:GetBucketLocation"
      ]
    }
  ]
}
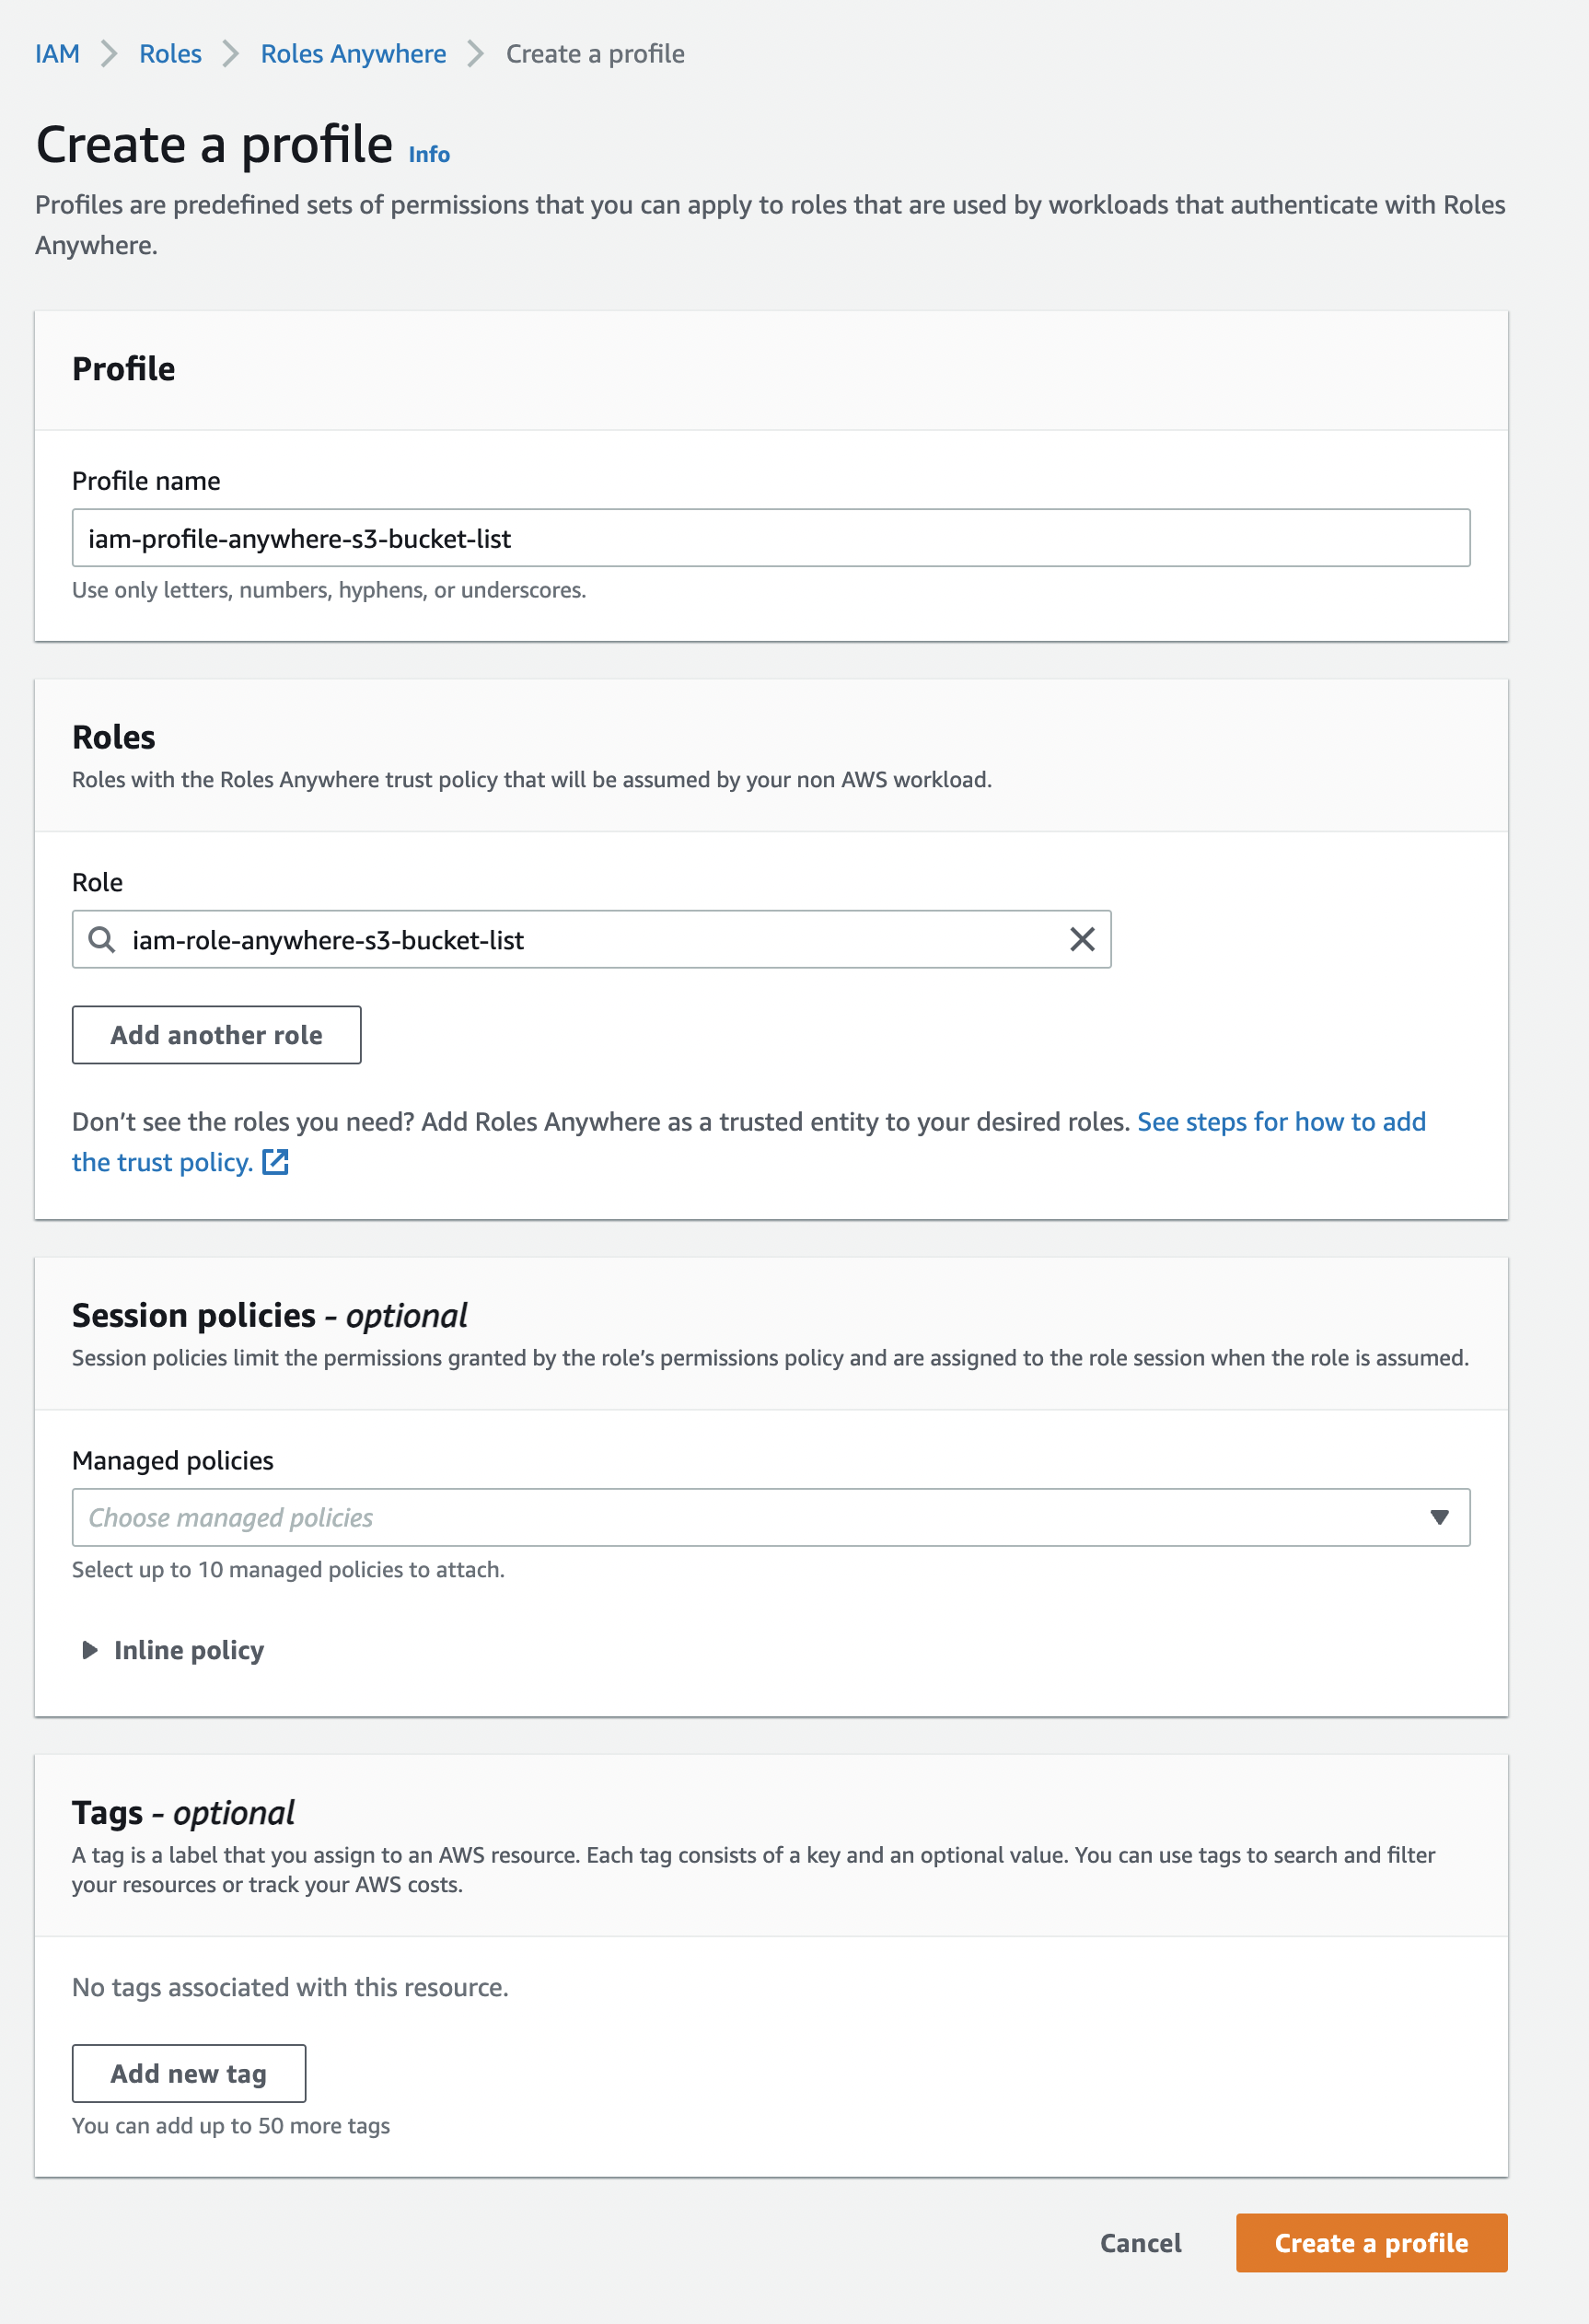
The last step is to create a Roles Anywhere Profile which is needed together with the IAM Role to assume them later on via the aws_signing_helper. Therefor please go back to AWS IAM -> Roles -> Roles Anywhere “Manage” and click within the Profiles area on “Create a profile”.
Now you can configure a Profile name and assign the role we created before to the Roles Anywhere Profile. Here you can also define conditions (e.g. the request must be done from particular IP) to further reduce the access on this profile / connected Roles.
(2) Generate a certificate with Common Name on-prem-instance
The next step is to generate within the PKI in HashiCorp Vault a new Role that allows to generate Certificates with a Common Name on-prem-instance.
vault write pki-aws/roles/on-prem-instance \
      allowed_domains=on-prem-instance \
      allow_bare_domains=true \
      allow_subdomains=true
As soon as this is done we can request our first certificate that is signed by our central Certificate Authority:
vault write pki-aws/issue/on-prem-instance \
      common_name="on-prem-instance"
(3) Request temporary AWS IAM Credentials via AWS IAM Roles Anywhere
As we now have received a certificate and a private key we can store them on disk and use the aws_signing_helper to obtain AWS IAM Credentials via the following command:
./aws_signing_helper credential-process \
    --certificate cert.pem \
    --private-key private.pem \
    --trust-anchor-arn arn:aws:rolesanywhere:eu-central-1:<account-id>:trust-anchor/<trust-anchor-id> \
    --profile-arn arn:aws:rolesanywhere:eu-central-1:<account-id>:profile/<profile-id> \
    --role-arn arn:aws:iam::<account-id>:role/<role-name>
In a last step we can export those credentials for example as environment variables:
export AWS_ACCESS_KEY_ID="<AccessKeyId>"
export AWS_SECRET_ACCESS_KEY="<SecretAccessKey>"
export AWS_SESSION_TOKEN="<SessionToken>"